What Is a Raised Relief Map?
A Raised Relief map, sometimes referred to as a 3D topography map, is a type of that map that shows off terrain three-dimensionally rather than in 2D, providing map users a more physically descriptive map than they’d get with a more traditional (i.e., flat) map medium.
Traditional topographical and terrain maps are an essential way to record and aid in the exploration of the world around us. They give us an overview of everything from valleys to streams to huge man-made landmarks. But as helpful as the typical map can be, they do often fall a little flat – literally.

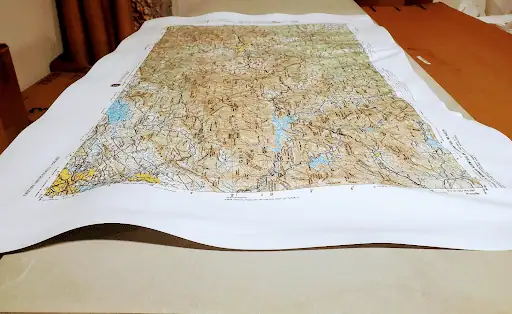
Raised relief maps aren’t like those standard flat maps. Raised relief maps are able to depict the topography of an area by reflecting elevation changes in 3-D. People experience the World in three dimensions, so having a map with bumps and dips that correspond to real world mountains and valleys makes raised relief maps uniquely descriptive. Look and Touch! Not only does the 3-D help the viewer visualize how a place looks, raised reliefs are maps that you can’t help touching. This dynamic property of raised relief maps makes them literally and figuratively stand out.
The process for creating these is a little more involved than standard flat maps, usually raised relief maps are vacuum-formed over a specially-crafted mold. Raised reliefs showcase the variation of steep peaks and dramatic valleys of real world terrain in scale model format.
Maps You Can Feel
While these raised reliefs can be aesthetically pleasing, and physically interactive, it’s important to take these representations with a grain of salt. These 3D terrain maps may – in many ways – appear more realistic than their flat counterparts, but they’re not necessarily more accurate.
Showcasing realistic texture and topography frequently necessitates significantly altering certain dimensions in a practice commonly referred to as “vertical exaggeration.” Through this, the height of mountains, cliffsides, buildings, hills, and other landmarks can be stretched anywhere from 10% to even 1000% of what’s appropriate for the map’s overall scale, creating the appearance of massive features regardless of their real-world scale.
Accuracy is often traded for texture and presentation, resulting in a less objectively, scientifically reliable map. Note that this isn’t always the case. There are some means of creating raised relief maps that significantly minimize vertical exaggeration, but most people use Raised relief maps to get a general sense of a landscape’s topography and aren’t using them for navigation purposes.

Categories of Raised Relief Maps
Form or Function? As far as utilization is concerned, raised relief maps fall into two categories. The first of these categories is referred to as ‘practical’. If a map is in the practical category then that 3D map is designed to be functional and scientifically accurate; their main purpose is to communicate information about a specific place’s terrain and topography. Scientists, explorers, travelers and educators/students use them, gaining valuable insight about elevation values and locators, landscape look and color, city/sight names, and other geographic features.
On the other side of the coin you have raised relief maps that fall into the category that can best be described as ‘artistic’ maps. Unlike their practical counterparts, these 3D raised relief maps are primarily used for aesthetic purposes. Artistry is valued above all else, including the information presented, and acts as the main source of design inspiration. These maps are often used as decor and are meant to be more evocative than accurate.
Creating a Raised Relief Map
The first step in Raised Relief creation is actually one of the most complex, because map makers have to collect and translate elevation data. This is done by using Digital Elevation Models or data captured from satellites, photographs, etc., that’s organized digitally and processed to represent physical location terrain.

Map creators must gather all available topographical and elevation data by reaching out to organizations or companies who collect this information. Obviously, that’s no small feat. Once this is done, the actual mapmaking can finally begin. But how does one make a raised relief once they have elevation data? Currently, there are about four processes one can choose from: Layer Stacking, Vacuum Formation, Solid Terrain Modeling, 3-D Printing.
LAYER STACKING – This technique requires cutting sheet material in successive layers, following the edges of a topographical map’s contour lines, then stacking these resulting layers to approximate the look of the terrain.
Layer stacked maps can then be used on their own or as a mold to make more durable plaster alternatives. Vertical exaggeration isn’t quite as dramatic with layer stacking, although it is rather time-consuming (and thus, costly) to do.

VACUUM FORMING – This technique calls for a master terrain model to be made with a milling machine, followed by creating a reproduction mold. Once this is cast, holes are drilled into the latter, and a plastic sheet is fitted over. An airtight seal and heater are then applied, leaving you with a plastic raised relief Map.

SOLID TERRAIN MOLDING – It is the high tech version of that salt dough map you made back in grade school . The modern technique founded in 2000 involves cutting dense polyurethane foam into the called for location shape then directly prints digital elevation data right on top of it.
Perhaps more aptly described as a model, these are usually large scale “one offs” Solid Terrain Modeling isn’t high-speed and is not that cost-effective for mass production.

3D PRINTING – This technique is the newest and fastest-growing means of making raised relief maps today. In this, 3D DEMs are rendered within a computer program and are sent to a 3D printer for – well – printing.
Plastic layers are then built on top of one another, and color is applied, directly translating what was once just an image on a screen into a tangible three-dimensional map. Size and terrain accuracy are well-preserved, speed isn’t an issue, and costs are fairly reasonable depending on the 3D printer and material in question.

How Does the Map Shop Do It?
At the Map shop we utilize the vacuum form method to create our raised relief maps. A sheet of pre-printed vinyl is heated then pulled onto a mold using air pressure.

To make a vacuum formed raised relief map you need four elements:
- Heat resistant mold of the location you want to map
- Plastic based sheet that becomes pliable under heat
- Heat Source
- A vacuum (the air pressure kind not the kind that cleans your rug)
How Molds Are Made
They are made very carefully! Here at the Map Shop we call them “Molds” but you may hear some people call them “Plugs” or “Bucks”. Whatever you call them – the first step in creating a raised relief is to sculpt/carve a scale model of the location you want to map.
The material you use to make your mold depends on how long you need your mold to last. If you just need to make a few maps you can make a mold out of a softer less durable material (clay, wood, or less dense plastic substrate) but if you are looking to use your mold over and over, a more robust material will be required such as: porcelain, metal, fiber-glass, or high density plastics.
Back in the early days of Hubbard Scientific artisans would painstakingly sculpt a scale model of what they wanted the map to look like, then create a negative cast using plaster. Using the negative plaster cast they would make a fiberglass or porcelain mold that would serve as the actual model for vacuum forming. The Map Shop still has a few of these survivor molds and some are still in use to this day.

Nowadays the best way to create a raised relief mold is with the aid of a CNC machine. CNC means “Computer Numerical Control” Basically, it’s a really cool machine that can carve anything it’s programmed to – down to the smallest detail. However, you will need to tell it what to carve – so I hope you have your geophysical topographical scaling software handy – otherwise you may want to go old school and break out that bag of plaster.
Congratulations – you have hand crafted or machine tooled your mold,but if you want to make raised relief maps you have to drill holes throughout your perfectly good mold.
Will My Mold Suck?
Hopefully, but that’s a good thing. When a vacuum is applied beneath your mold, these holes will draw air through them (kind of like a reverse air-hockey table) and pull the heated plastic sheet tight against the mold creating the desired raised relief effect. Without the holes you will just have a lumpy piece of melted plastic for a map, and that’s just sad.
When drilling holes make them as small as possible; you don’t want them showing up as pock marks on the finished project. Once you have a scale model mold with tiny air holes you are ready to make a map- all you need now is: a map printed on a vinyl sheet, a heat source, and a vacuum.
What Materials Do You Use?
You will be melting your map onto a mold so you will need to print your pre-molded map sheet on some type of plastic material. We find the best material is a high grade rigid vinyl. Besides hitting that “Goldilocks” zone of stretching just enough under heat, it is a material that can be printed by most print shops.
Once you source your vinyl you will have to create a digital file with the data that corresponds to your mold dimensions. But remember when creating your digital file to allow for the fact that this print will be melted and stretched. You can choose to print a technical map or something more geared towards the aesthetic than accuracy. If you want both, good news, you can use the same mold with different style map prints as long as your mold lasts.

What Type of Heat Source is Required
You can use any heat source for making a raised relief map, as long as it is capable of melting the vinyl printed sheet. To get a rigid vinyl sheet of plastic to melt you will have to heat it over 200 degrees fahrenheit. The hotter the source the less time it will take to get your sheet to a pliable state suitable for vacuum forming.
A heating element like the kind found in a household oven would easily do the trick. The Map Shop does not recommend that you try to make raised relief maps in your oven – but if you can find or build a rig that uses a similar heating element -it for sure could work. We use an industrial machine specifically made for heat driven vacuum formation.
Raised Relief Conforming to the Mold
Raised Relief maps are formed when pressurized air pulls a sheet of heated plastic onto a perforated mold. Creating a working vacuum chamber for producing raised relief maps is the final piece of the puzzle.
The goal is to make an enclosure that a mold can sit inside of that is engineered to contain a vacuum. You can use a vacuum pump to produce the vacuum and run plumbing from the pump to the enclosure. Keep in mind that the vinyl sheet has to fit over the container and be secured in an air-tight fashion.

Picture someone putting a mold inside a drum. The skin of the drum would be the printed vinyl sheet…the drum itself would be the vacuum chamber, and the mold would sit inside. Then you would turn on your heating element, melt the vinyl just enough, switch on the vacuum and watch as the sheet “sucks” down onto the mold. You have just made a raised relief.
The Special Machine to Make Raised Relief
As of today there is not an all-in-one machine that is designed specifically to manufacture raised relief maps. If you were a child in the 60’s you may have owned the last commercially available raised relief machine on your toy shelf: The VAC-U-FORM

It was good for making two inch plastic toys and burning fingers.
As of today there is not a machine that is designed specifically to manufacture raised relief maps. Raised relief maps are not 3-D printed or punched out in an assembly line process. It takes a team of designers, craftspeople, and technical artists to turn a flat map into a raised relief.
While the practical elements of creating any raised relief are fairly simple: Sheet of plastic, Mold, Heat, & Pressure – the application of getting all these things to work in tandem to create a legible and aesthetic map ends up being a complex process. Lots of things can wrong:
- Incorrect registration of the sheet on top of the mold
- Overheating causing ink slippage
- Overheating causing a burnt map
- Air leaks in your vacuum chamber
- Sheet not sealed tight enough against the top of mold
- Cracks or warping in your mold due to heat
- Uneven heating
- Sheet sticking to the mold
Why to Hire the Map Shop
The skills and equipment required for making a raised relief map falls somewhere between baking a cake and achieving nuclear fusion. Fortunately there are a few people at the Map Shop up for the challenge.
We have already put in the work so you can just enjoy the maps. If you want to get your fingers on a raised relief map – you’ve come to the right place. Click the link to check out our selection of raised relief maps
If you want to learn about the history of Hubbard Scientific, the pioneer of the first commercially available raised relief maps, check out the link here!