You Don’t Have To Be Crafty To Be Mappy!
If you have a high quality antique map or a treasure map that leads to The Lost City of Gold-please for the love of Mapsquatch do not use them as crafting materials.
But if you are looking to utilize your basic older map that for some reason has outlived its practical use- here are a few projects perfect for the crafty DIYer of all levels.
If you’re far from the crafty sort, rest assured. There are tons of projects out there that even the DIY adverse can do-no specialty tools, or in-depth know-how required. You just need to find the one that speaks to you. Not entirely sure where to start? Our suggestion is to head on over to Pinterest, Instructables, or one of the other countless websites that feature quick DIY guides. You’d be amazed just how many map-related projects you can find.
Here are a few of our personal favorites. Each project is pretty fast and simple, but they’re still wonderful ways to breathe fresh life into those old maps long past their prime.
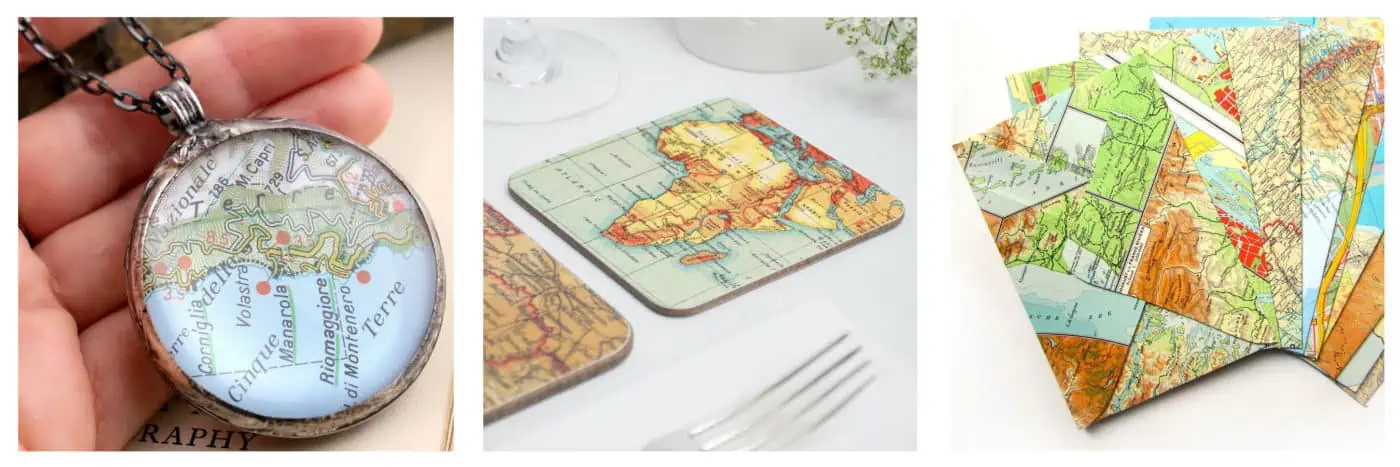
Glass Map Necklace
Are you the type who enjoys wearing your heart on your sleeve (or, in this case, around your neck) and putting your map-centric passions out there for all to see? If so, this is the project for you. While it sounds a little more involved than some of the others listed below, it’s actually very simple.
All you have to do is buy a round bezel with a glass cabochon, (which is a fancy word for a flat backed glass dome) cut your old map to fit the cabochon, adhere it all together, and voila! You now have a one-of-a-kind map necklace. Wear it on a chain you like, and it’ll be no time at all until everyone starts asking where you got it.
SUPPLIES
- Map Clipping
- Mod Podge
- Paint Brush
- Craft Squeegee
- 25 mm Antique Brass Round Bezel With Glass Cabochon
- Antique Brass Cable Chain – at least 18 inches, but a long length between 24-36 inches is really pretty for this style pendant
- Lobster Clasp & Jump Ring Set for shorter chain lengths
- Heavy duty permanent adhesive like E6000

STEPS
-
Pick an evocative part of the map you want to showcase in your necklace. use the glass cabochon and trace around it on top of the map. Cut the circle out. Lightly coat the clipping with Mod Podge.
-
Place the glass cabochon on top of the clipping. Twist it around to coat it well, and eliminate any areas that might not be coated in Mod Podge. Squeegee any excess Mod Podge that extroods out from the edges.
-
Give the backside of the map clipping a coat of Mod Podge to seal it, and let it dry. It should take about 30 minutes to fully dry.
-
The last step is to adhere the cabochon to your bezel. You only need a very thin coat of E600 for a permanent mounting. If you get too much, it can bleed through your graphic and look black. Add a dot of adhesive near the exact center, press the cabochon into the bezel and twist it all around to spread out the glue
-
Allow at least one hour before you try to wear it. For glue to completely cure, allow 24 hours.
Map Coasters
A cool beverage on a warm day is always nice, but with ice cold refreshment comes that pesky ring of condensation the glass leaves behind. Let that sucker sit for a while, and that expensive coffee table or desk you just brought home will end up stained and ruined. No one wants that, so why not try out this furniture saving map coaster
The coasters will protect your furniture from any lasting harm and will look great doing it, which is always a plus. Just be sure to remind guests to actually use them. We all know they won’t automatically do it on their own.
SUPPLIES
- Coasters (sandstone coasters work particularly well because of their satisfying heft)
- Paper Map
- File folder or cardboard for template
- Scissors / Exacto knife
- Mod Podge
- Foam brush

STEPS
-
Turn the coaster upside down cardboard and trace around the coaster. Cut out the template.
-
Place the template over sections of your map you want to use and trace around the template onto the map then and cut out those sections of your map.
-
Apply a thin layer of Mod Podge to the coaster and also back of map clippings.
-
Adhere map clippings to the coaster and press out bubbles, starting at the center and working outward.
-
Apply a thin layer of Mod Podge to the top of the paper coaster. Let dry.
-
Pour yourself a drink
Map Envelopes
Usually, people use maps when going on a journey – But when you turn your old maps into envelopes it’s the map that gets to go on a trip.
Map envelopes! serve as a great way to jazz up any letter or note that you send out. Friends, family, and any postal worker who crosses paths with it won’t be able to stop smiling.
SUPPLIES
- Paper Map
- Sample Envelope
- Poster Board for a template
- Scissors
- Pencile
- Glue
- Ruler

STEPS
-
Make a Template – The easiest way to make a template is to take a sample envelope and unfold it. Carefully tear apart where the envelope is glued until you have an “exploded” envelope. Take that “exploded” envelope and place it on top of poster board and trace its shape onto the poster board.
-
Fold the envelope using the notches in the original envelope as a guide- you can see where you should fold your map envelope cut-out. Using a good straight edge can help you make crisp folds
-
Apply a glue to the overlap areas of the side folds. Then press the bottom fold into place. You can place a scrap of poster board “inside” the envelope during gluing to catch excess glue. But remove the scrap while the glue is wet and dab away any excess glue to prevent the front and the back of the envelope from gluing itself shut.
-
Put something heavy on the seams of your envelope until the glue dries
-
Once the glue is dry you are ready to write me a note and send it to me in the coolest envelope ever made
Map Art
The projects we mentioned are fun and don’t call for much effort or time. But what if you really aren’t too sure about hopping on the crafty bandwagon? Just make (and we use that term loosely) some simple map art.
Since it pretty much only requires buying a frame and cutting your map to size, it’s the ultimate low-effort project.
No muss, no fuss, and nice to look at, this should immediately become a go-to for a map that now has more use as decoration than for navigation.
